
December 7, 2024
How to Edit a Science Experiment Video in CapCut for Better Clarity
READ TIME: 7 MIN.
Creating clear and engaging science experiment videos can be tough for students, teachers, and science lovers. Clarity is key to conveying scientific concepts. When videos are unclear, important details may be lost, making it hard for viewers to understand the experiment. Using video editing software like CapCut can help enhance video clarity.
This tool allows users to trim clips, add text, and improve overall presentation. While CapCut offers free basic features, some advanced options may require payment. Utilizing such tools, creators can produce better educational content that captivates and informs their audience. For more insights on this topic, read the complete blog!

Why Use CapCut Desktop Video Editor for Science Experiment Videos?
CapCut Desktop is a powerful tool for creating science experiment videos. Here's why it's beneficial:
• Eliminate Background Noise and Distractions: A cluttered lab can distract viewers. CapCut's video background remover helps eliminate unnecessary elements, allowing viewers to focus on the experiment.
• Enhance Visual Clarity: Video stabilization and brightness adjustment improve video quality. Clear visuals are crucial for demonstrating chemical reactions or equipment setups.
• Time-Saving Features: CapCut's intuitive interface and pre-set templates save users time. The auto-captions feature generates subtitles automatically, making it easier for viewers to follow along.
• Flexible Export and Sharing Options: Users can export videos without watermarks, ensuring a professional finish. CapCut allows customization of export settings like resolution and frame rate. This makes it easy to share on platforms like YouTube or classroom portals.
By using CapCut Desktop, you can create polished, engaging science videos that captivate your audience.
Steps to Edit a Science Experiment Video in CapCut
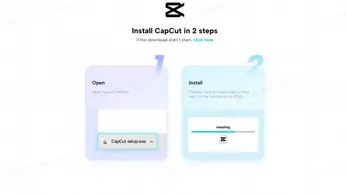
1. Download and Install CapCut
For downloading and installing CapCut, head to the CapCut official website. Look for the desktop video editor option and click on it. Proceed with the prompts to initiate the free setup. The setup is simple and quick.
After installation, you can explore various tools for editing your videos. Remember that while CapCut offers many features for free, some advanced options in this video editing software may require payment. Have fun crafting and improving your videos using CapCut's intuitive interface and robust features!
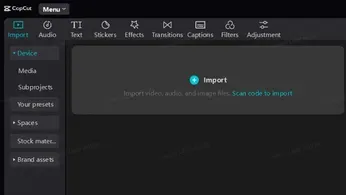
2. Import Your Video
To import your science experiment video into the CapCut desktop video editor, start by opening the app. Click on "Create Project" to begin. You can import your video using two methods. Initiate the process by selecting the 'Import' option in the media tab. This opens a file browser where you can select your video file.
Pull the video from your file explorer and drop it into the CapCut interface. Once imported, your video will appear in the media library, ready for editing. Simply drag it to the timeline to start working on your project.
3. Edit for Clarity
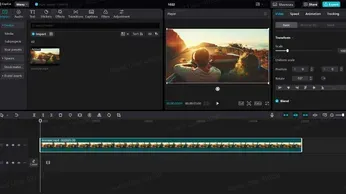
To edit videos in the CapCut desktop video editor, follow these steps:
• Stabilize the Video: Open CapCut and bring in the video that's shaky. Click on the clip in the timeline. Find the 'Basic' settings in the top-right corner. Scroll down and check the "Stabilize" box. Choose a stabilization level: "Recommended," "Minimum cut," or "Most stable." Click to apply and wait for processing.
• Adjust Lighting and Contrast: Select your video clip. In the same "Basic" settings, find brightness, contrast, and saturation tools. Adjust these sliders to enhance visibility. Increase brightness to lighten dark areas, raise contrast for depth, and boost saturation for vibrant colors.
• Cut Unnecessary Sections: Highlight the clip in the timeline. Adjust the playhead to the position for trimming. Right-click and hit 'Split' or use the scissor feature. Clear unnecessary sections by selecting and deleting them.
These simple steps will help you create polished videos with the CapCut desktop video editor.
4. Add Annotations and Subtitles
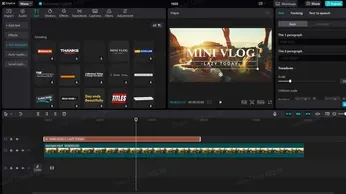
To use CapCut's auto-captions feature, start by opening your video project. Click on the "Text" option and select "Auto Captions." This will generate subtitles automatically based on your video's audio. After the captions appear, review them for accuracy. You can easily edit any mistakes by tapping on the text.
For better understanding, you can add explanatory text or labels. Click the "Text" button again and choose a style that fits your video. Type your additional information and place it where needed. Tweak the size and color to highlight it. This technique promotes clarity and ensures audience engagement. Using auto-captions saves time and makes your content more accessible to everyone. Enjoy creating!
5. Export and Share the Video
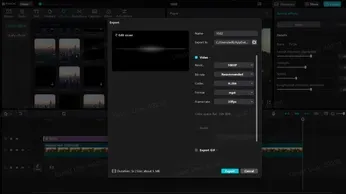
Adjust the resolution and frame rate to export and share your video in the CapCut desktop video editor. Click on the export button, choose your desired format, like MP4 or MOV, and set the resolution to 1920x1080 for high quality. Select a frame rate between 24 to 60 fps based on your needs.
Once you finish these settings, click Export to save your project. Afterward, share your video directly on sites like TikTok and YouTube. Tools like the video background remover can greatly enhance your video's professional look. This feature lets you easily remove unwanted backgrounds, making your content more engaging and visually appealing.
Wrapping Up
Editing science experiment videos with the CapCut desktop video editor enhances clarity and viewer engagement. Clear, professional videos help convey complex concepts effectively, making them more accessible to everyone. Features like auto-captions improve accessibility, while the video background remover keeps the focus on important content. CapCut's user-friendly tools allow creators to produce polished, watermark-free videos effortlessly.
Both free and paid features ensure that anyone can create high-quality content without extra costs. Users can explore advanced tools to elevate their projects further. Start editing your next experimental video with the CapCut desktop video editor to see the difference in quality and impact. Experience how easy it is to create engaging videos that resonate with your audience.


